

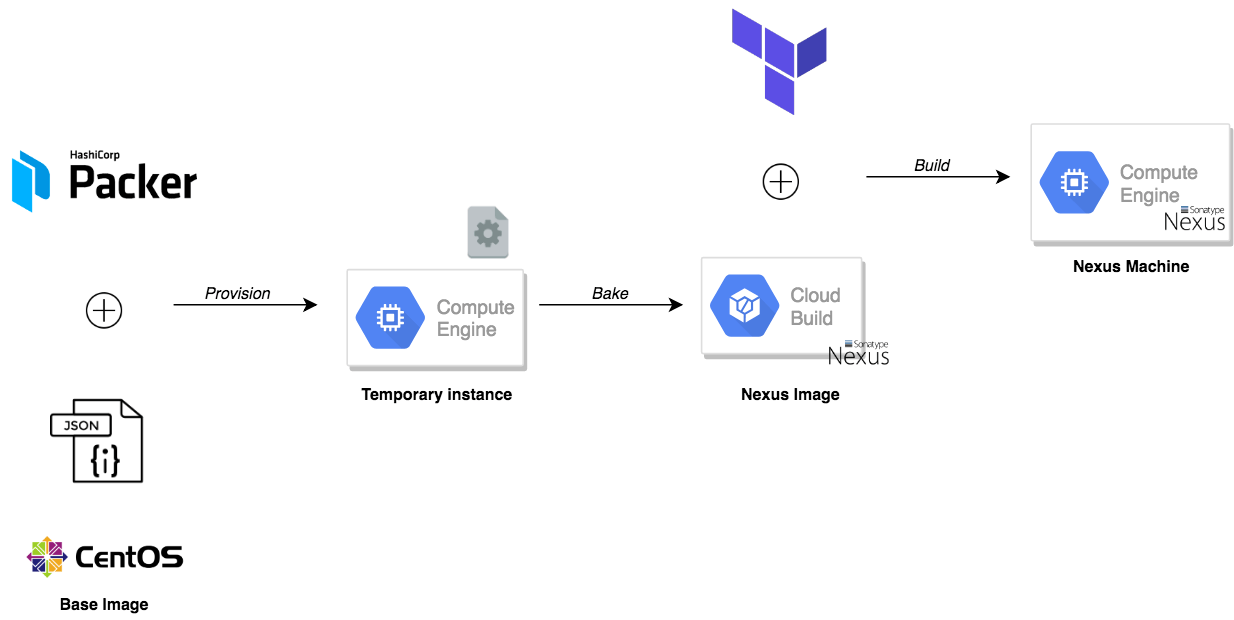
In this post, I will walk you through how to deploy Sonatype Nexus OSS 3 on Google Cloud Platform and how to create a private Docker hosted repository to store your Docker images and other build artifacts (maven, npm and pypi, etc). To achieve this, we need to bake our machine image using Packer to create a gold image with Nexus preinstalled and configured. Terraform will be used to deploy a Google compute instance based on the baked image. The following schema describes the build workflow:
PS : All the templates used in this tutorial, can be found on my GitHub.
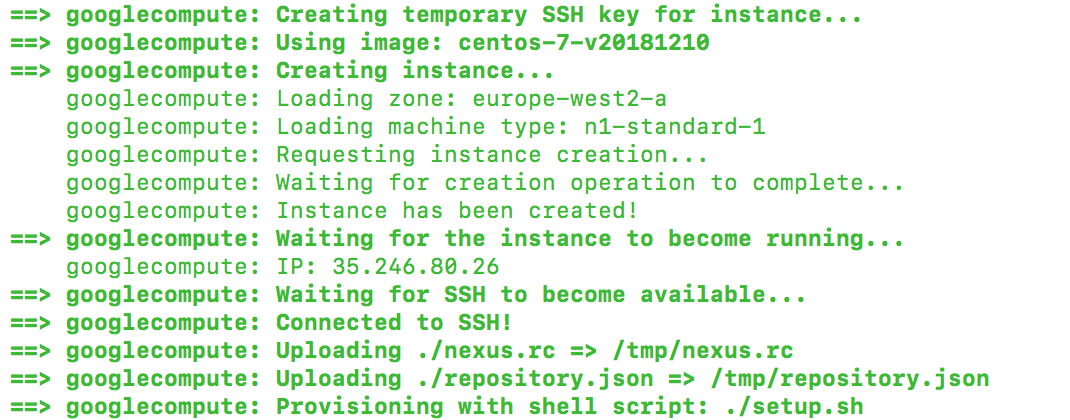
To get started, we need to create the machine image to be used with Google Compute Engine (GCE). Packer will create a temporary instance based on the CentOS image and use a shell script to provision the instance:
1 | { |
The shell script, will install the latest stable version of Nexus OSS based on their official documentation and wait for the service to be up and running, then it will use the Scripting API to post a groovy script:
1 | #!/bin/bash |
The script will create a Docker private registry listening on port 5000:
1 | import org.sonatype.nexus.blobstore.api.BlobStoreManager; |
Once the template files are defined, issue packer build command to bake our machine image:
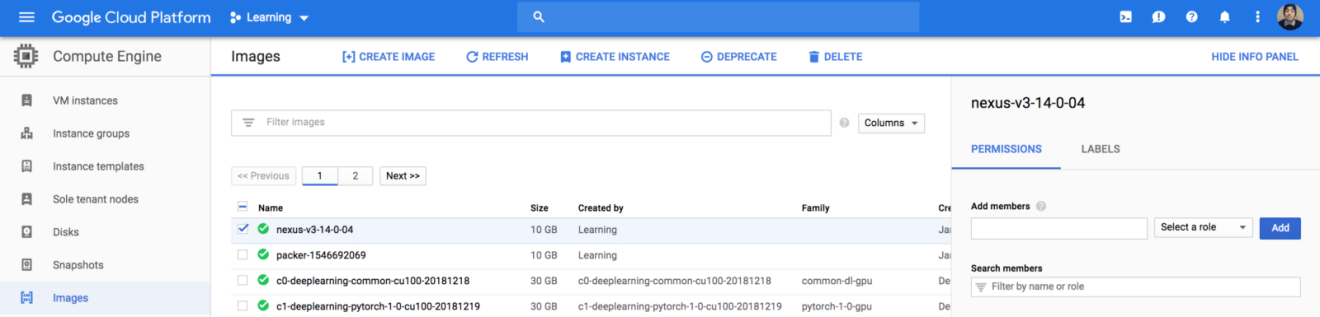
If you head back to Images section from Compute Engine dashboard, a new image called nexus should be created:
Now we are ready to deploy Nexus, we will create a Nexus server based on the machine image we baked with Packer. The template file is self-explanatory, it creates a set of firewall rules to allow inbound traffic on port 8081 (Nexus GUI) and 22 (SSH) from anywhere, and creates a google compute instance based on the Nexus image:
1 | provider "google" { |
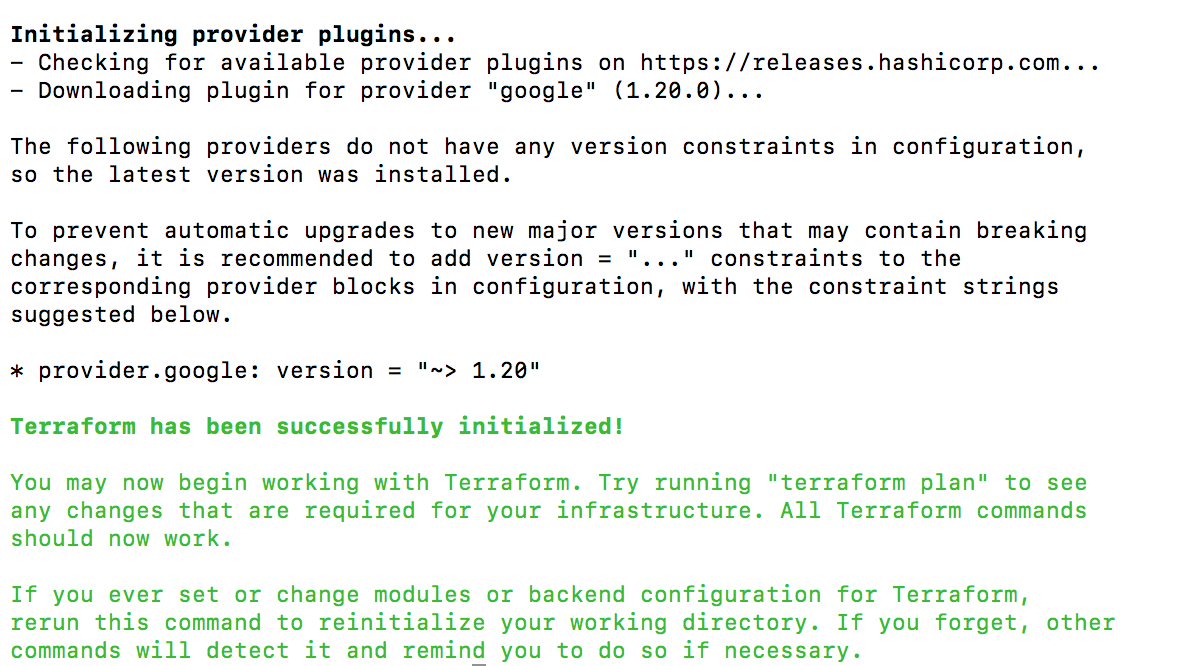
On the terminal, run the terraform init command to download and install the Google provider, shown as follows:
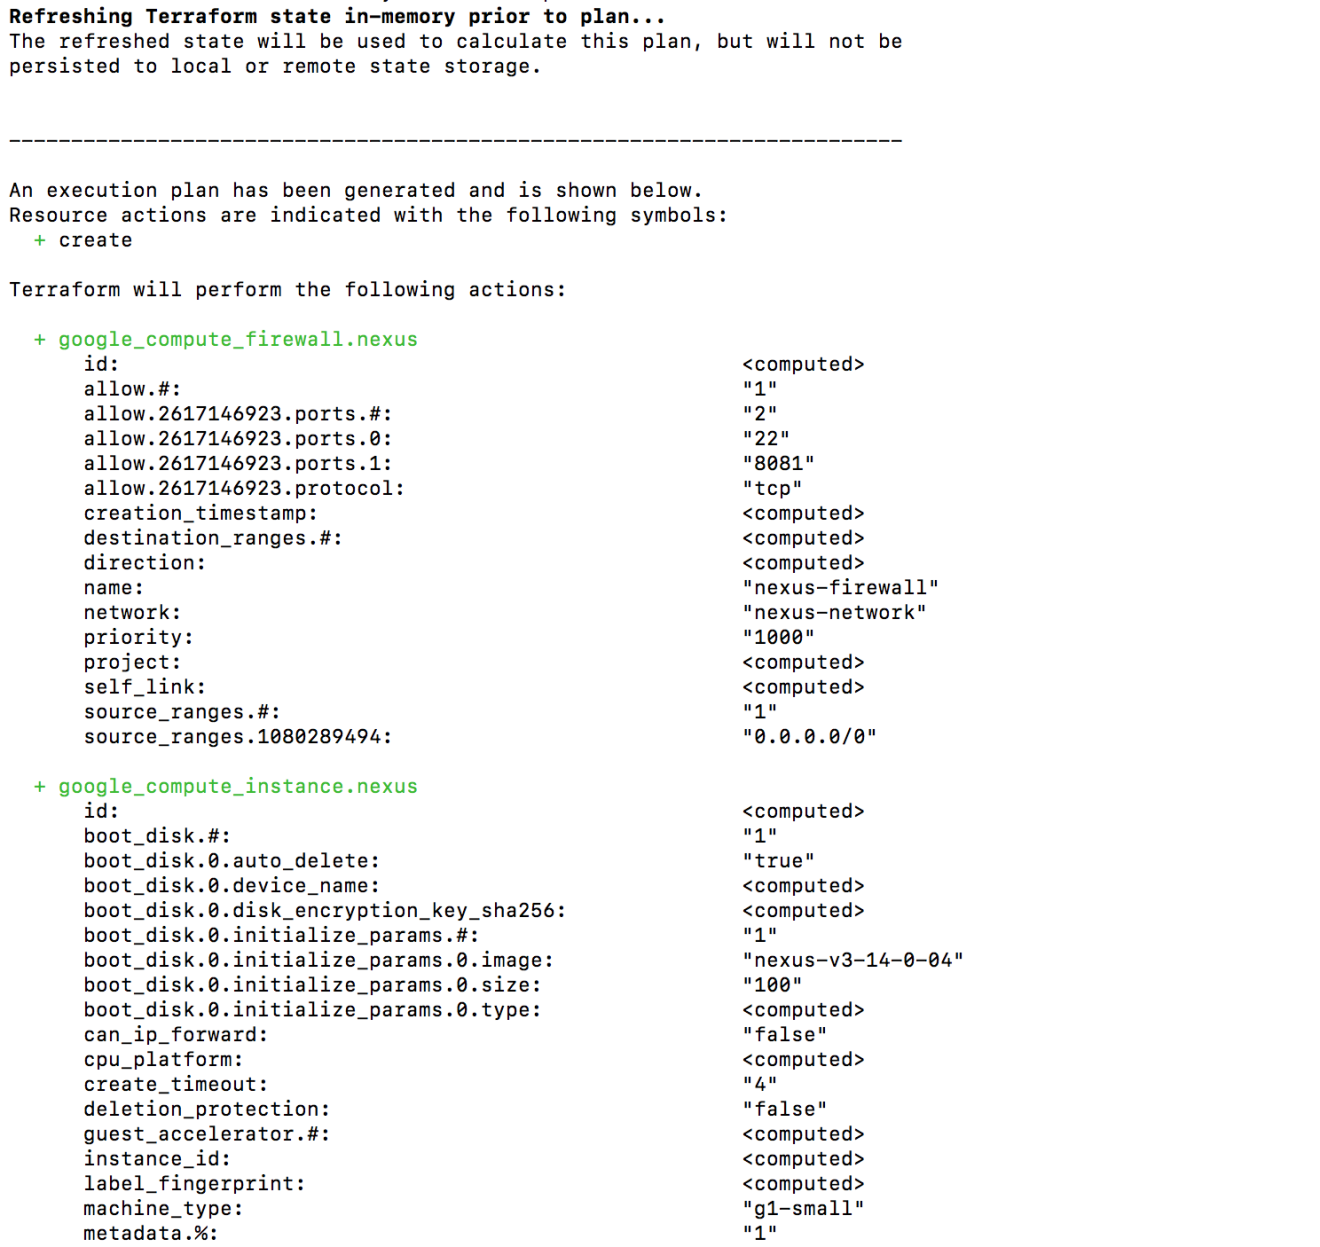
Create an execution plan (dry run) with the terraform plan command. It shows you things that will be created in advance, which is good for debugging and ensuring that you’re not doing anything wrong, as shown in the next screenshot:
When you’re ready, go ahead and apply the changes by issuing terraform apply:
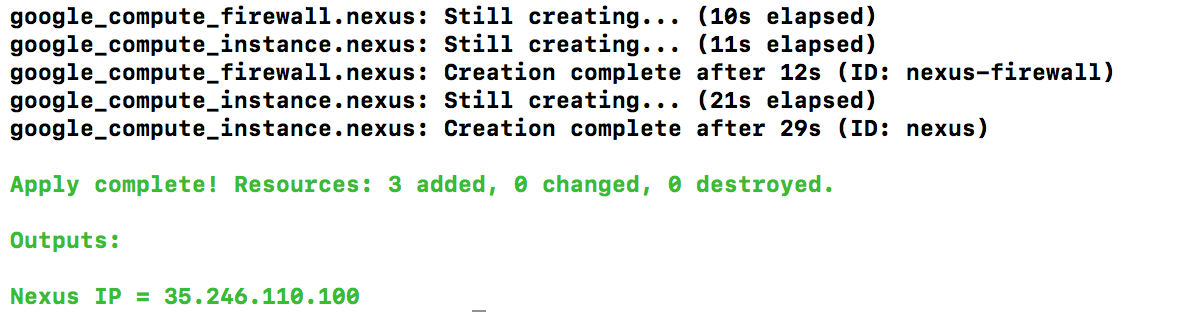
Terraform will create the needed resources and display the public ip address of the nexus instance on the output section. Jump back to GCP Console, your nexus instance should be created:

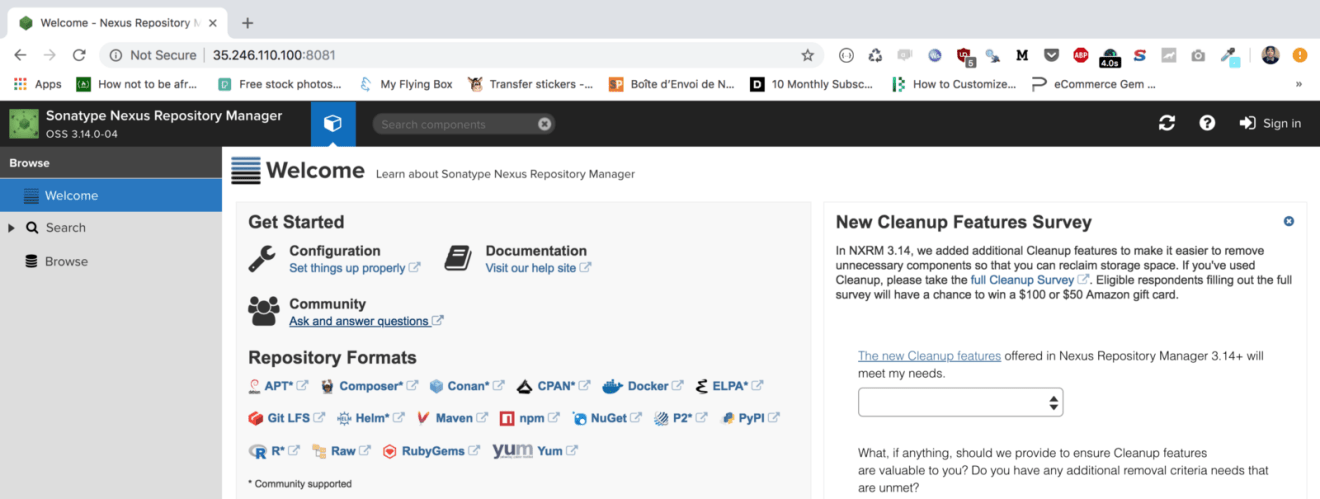
If you point your favorite browser to http://instance_ip:8081, you should see the Sonatype Nexus Repository Manager interface:
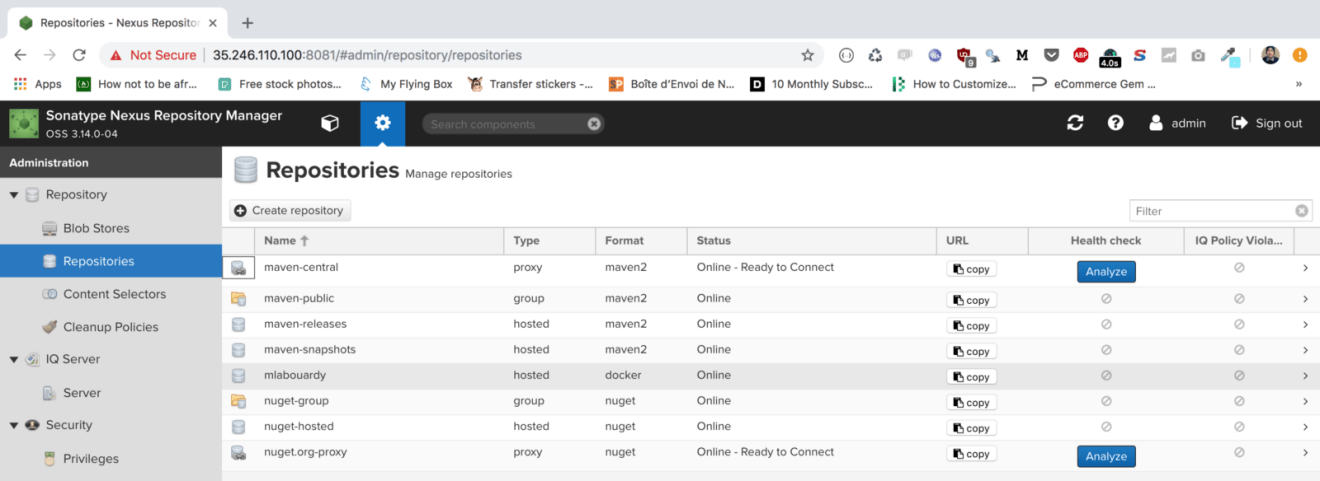
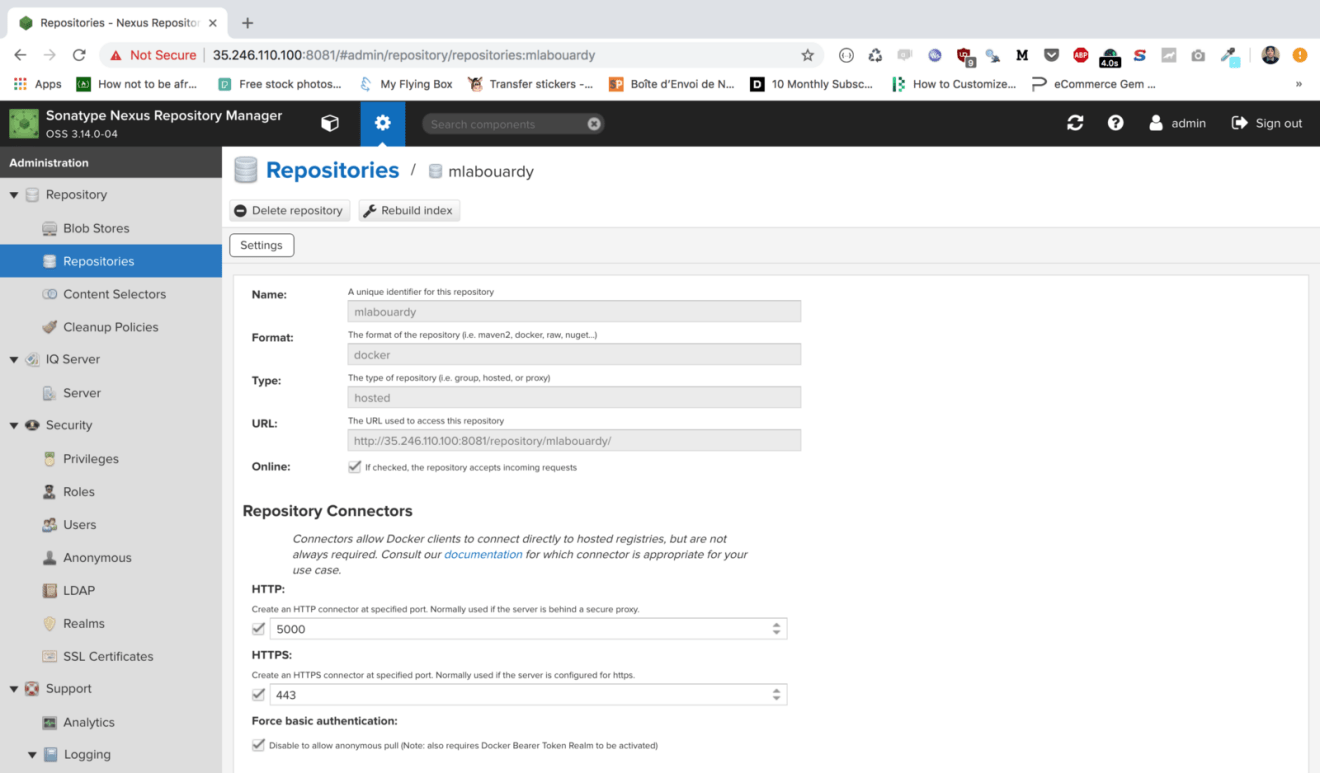
Click the “Sign in” button in the upper right corner and use the username “admin” and the password “admin123”. Then, click on the cogwheel to go to the server administration and configuration section. Navigate to “Repositories”, our private Docker repository should be created as follows:
The docker repository is published as expected on port 5000:
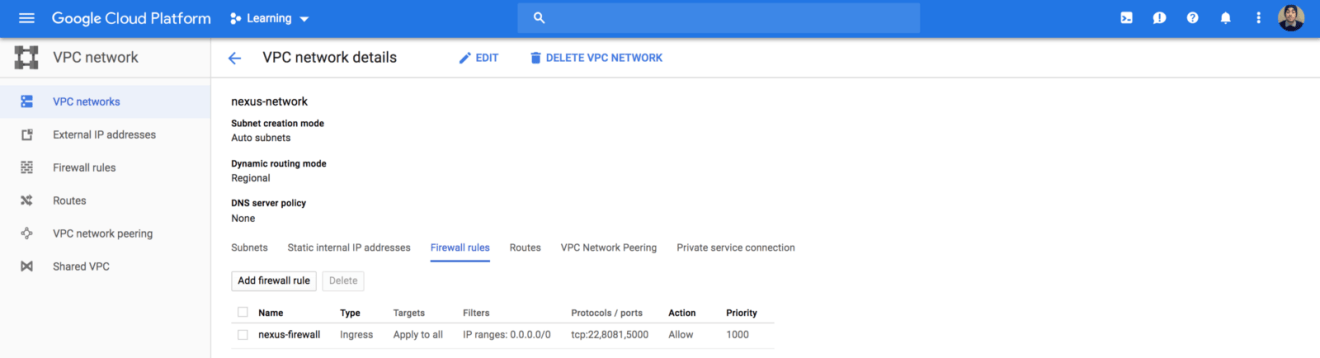
Hence, we need to allow inbound traffic on that port, so update the firewall rules accordingly:
1 | resource "google_compute_firewall" "nexus" { |
Issue terrafrom apply command to apply the changes:
Your private docker registry is ready to work at instance_ip:5000, let’s test it by pushing a docker image.
Since we have exposed the private Docker registry on a plain HTTP endpoint, we need to configure the Docker daemon that will act as client to the private Docker registry as to allow for insecure connections.
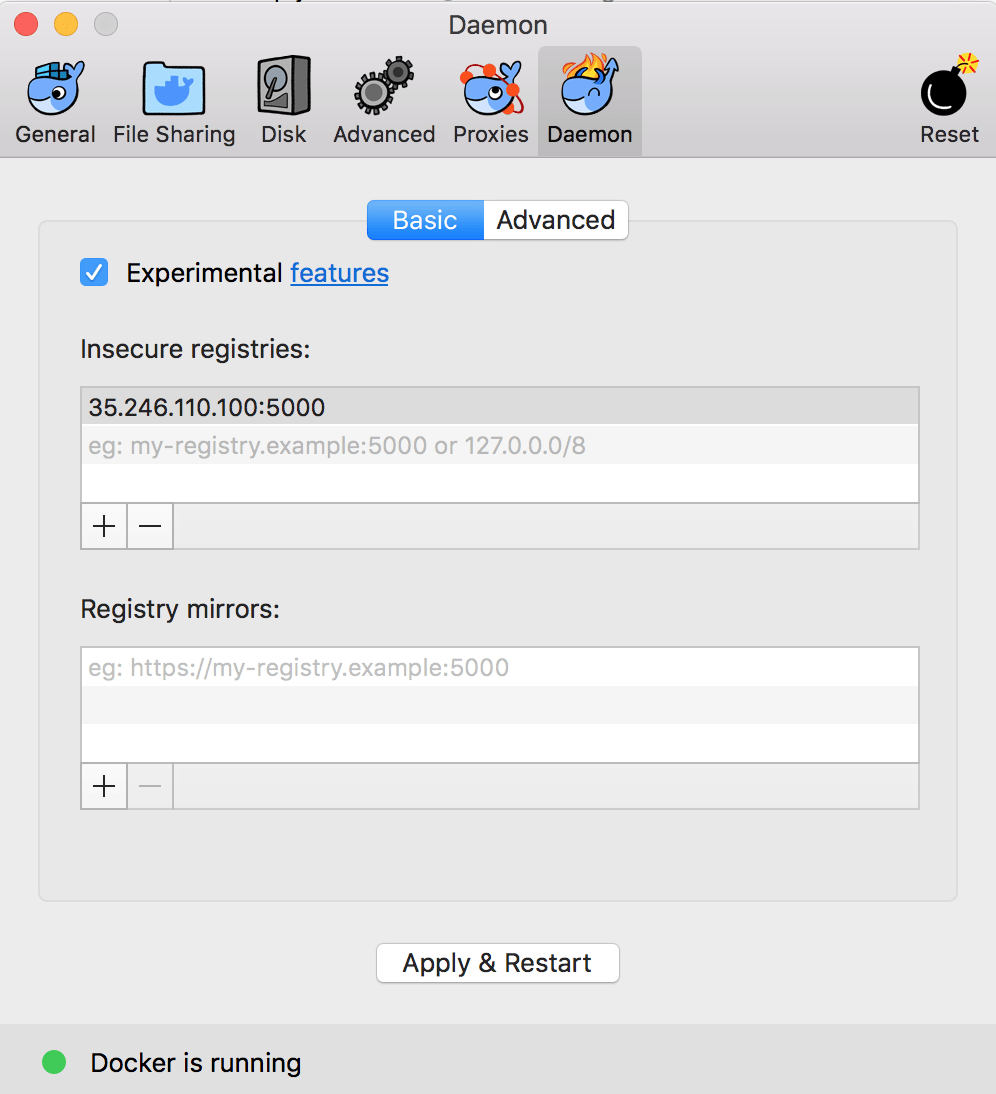
- On Windows or Mac OS X: Click on the Docker icon in the tray to open Preferences. Click on the Daemon tab and add the IP address on which the Nexus GUI is exposed along with the port number 5000 in Insecure registries section. Don’t forget to Apply & Restart for the changes to take effect and you’re ready to go.
- Other OS: Follow the official guide.
You should now be able to log in to your private Docker registry using the following command:

And push your docker images to the registry with the docker push command:

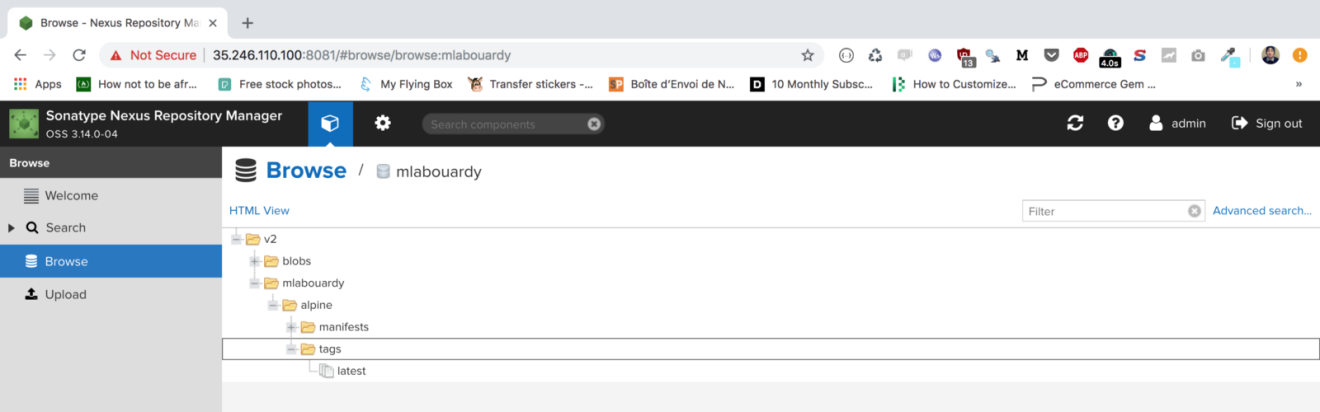
If you head back to Nexus Dashboard, your docker image should be stored with the latest tag:
Drop your comments, feedback, or suggestions below — or connect with me directly on Twitter @mlabouardy.